Getting Started
In this guide, we go through all the steps that need to be taken after customers put their first order. These steps are needed to take the full advantage of Smart SEO Hosting offerings. Whenever a new order is made, the billing software checks the order and the customer's details against different fraud databases. This process usually takes a few seconds, and after that, the service is up and running in less than a minute. As a part of the setup process, a welcome email is sent to the client which contains essential information on how to connect to the newly setup service.
How to Login to the WHM account.
The URL, username, and password of your reseller WHM account should already be sent to you in your welcome email. Your WHM server URL has the following format https://whmXX.smartseohosting.net:2087 where xx is a 2 digit number. In this document when we ask you to login to your WHM reseller account, You will need to go to your WHM address and enter the username (an 8 characters word) and your password.
Change the WHM password
As mentioned above, the welcome email contains the username and password and the WHM server address of the newly created account among other information. WHM is a server from our list of servers in which a client can create new websites and manage them through a single reseller account. One of the first actions that you need to take is to log in to WHM and change your reseller password. Here are the steps:
Changing Password Steps
- Click on the WHM address link in your welcome email
- Enter your username and password
- From the left menu click on "List Accounts"
- In the right panel, you should now see the domain name you entered when you put your order. This domain/account is your main (reseller) account.
- To the left side of the domain name, there is a plus sign. Click on the plus sign to open the actions panel for that account.
- Now you should see a field labeled "Change Password". Enter your new password.
- Click Change.
The following video demonstrates the above steps:
Create a New WHM Package
A WHM package (not to be confiused with package/product that you order on our website), is template that WHM uses to create a new website/account. When the billing software sets up your service, it also creates a new default WHM package.
The default package allocates 2000MB of traffic and 1000MB of disk space to each new websites that you may create. This setting is usually more than enough for most of our clients but if you need a different set of parameters you will need to create a new package.
Here are the steps needed to create a new WHM package:
Steps creating a new package
- Login to your WHM account using your reseller username and password
- From the left menu click on "Add a Package"
- Enter the new package name
- Enter the amount of disk space you want to allocate to your new websites in MB.
- Enter the amount of Bandwidth you want to allocate to your new websites. You can enter a large number here to act as unlimited as our offering comes with unlimited bandwidth 1.
- Click on Add.
Attention
Do NOT set the package bandwidth limit to unlimited. The system will not let you use a package with unlimited bandwidth.
The following video demonstrates the above steps:
Add a new Domain/Account
Now is time to create your first website. When you create a new account, you will, in fact, create a new cPanel account which will only have access to the resources allocated to that domain and is used for management of that single website.
Here are the steps needed to create a new WHM cPanel account:
Steps creating a new package
- Login to your WHM account using your reseller username and password.
- From the left menu click on "Create a New Account".
- Enter the domain name.
- Enter a password and enter it again.
- Enter an admin email address for the domain.
- Pick a package from the drop-down list.
- Move to the bottom of the page and click on the "Create" button
The following tutorial demonstrates the above steps:
Note
WHM uses the values entered in the package as a template to create the new account. What WHM does is that it copies those values over. If you later change the values of a package those changes do not automatically apply to already created accounts.
Transfer Your Domains Over (optional)
If you already have your domain setup with your old provider and you want to move them over, we can help you do this for free.
Please contact support and open a ticket with the details of your old account.
Note
We only provide free transfer for WHM/cPanel accounts which should cover almost all cases. If for some reason your old provider did not provide you with cPanel account you will need to manually organize for the transfer.
Note
If you want to transfer your WordPress site from a none cPanel provider to us, you may use many freely available WordPress backup and restore plugins.
Upload The Website using FTP
If you need to upload a file or a series of files to your server we suggest you use an FTP client or the file manager's web interface from inside each cPanel account.
To use FTP, you will need an FTP client. All FTP clients should work with our FTP servers without any problem. A good open source FTP client is Filezilla which you can freely download.
Important
FTP Servers are only installed on the WHM server. In other words, you need to use your WHM IP for the FTP server's IP, regardless of the IP address you might have assigned to that domain.
Assign an SEO IP
Each web hosting package you order from the Smart SEO Hosting website comes with a set of Smart SEO IPs equal to the number of the package IPs. Those IPs are in addition to the WHM IP. For instance when you order "20 Google C-Class" package. You will get a single reseller account on a WHM server. That server has an IP to which we refer as your WHM IP. In addition, you will also get 20 more IPs that are all inside Google datacenter.
By assigning SEO IPs to your domain, the content of your website gets copied over to the datacenter of the assigned IP (ie. Google DC) and from there gets published on the Internet.
Here are the steps to assign a new IP to your website:
IP assignment steps
- Login to your WHM reseller account.
- Locate the "Smart SEO Hosting" section within the left menubar.
- Click on "IP Manager".
- Now you should see a list of your domains on the right (main panel).
- Select the domain (or username of the domain) that you want to assign the IP
- You will see the current IP information of the domain is displayed next to the domain
- Move down the page and click on "Change IP address"
- In the new page, you should see a dropdown with the list of all your SEO IPs.
- Pick one that you want to assign to your domain. The map on the right changes to reflect the location of the IP.
- Click on the "Apply" button and your domain now should have the new IP assigned to it.
Below you can watch a video of the above step using an older version of the IP manager:
Setup SEO DNS Server
Although your welcome email specifies 2 different nameservers which you can use, you might want to set up your own DNS server. This could help with the zero footprint hosting. You can set up a vanity DNS server (ns1.yourdomain.com and ns2.yourdomain.com) using 20+ different DNS IPs or even your domain IP. In addition, you can use from a list of 3rd-party DNS servers Free.
Note
The additional IPs that you use for your DNS servers are all provided for free and are not counted towards your SEO IP allocations.
Setting up DNS servers is usually a complicated process but here we have written a program that makes all the process as easy as a single mouse button click.
DNS Setup Steps
- Login to your WHM reseller account.
- Locate the "Smart SEO Hosting" section within the left menubar.
- Click on "SEO DNS Manager"
- From the list pick the domain name you want to set up a DNS server.
- On the right, you now have 3 options. Pick the DNS type that suits your strategy the best.
- Click on the blue button.
- The system now set up the DNS server in the background and provides you a list of actions you need to do at your domain registrar.
- Take note of those actions as you will need them in the next step.
Change the Nameservers at the Registrar
Now that you have set up your DNS server you will need to set up your domain to use these DNS servers. Depending on the DNS Server strategy you picked while setting up your DNS server you might have to register the nameservers at your domain registrar (ie godaddy, namecheap...)
- If you picked "3rd party" as your DNS type while setting up your DNS server all you need to do is to go to your domain registrar and change the nameservers of your domain name to the new DNS servers.
- For all other cases you are going to first need to register ns1.yourdomain.com and ns2.yourdomain.com at your registrar.
Important
You can only change your domains DNS setting to registered name servers. That is why you should first register your ns1.yourdomain.com and ns2.yourdomain.com name servers.
- To register your ns1.yourdomain.com and ns2.yourdomain.com nameservers, different domain registrars have different web interfaces. But the idea is very simple. You will have to provide the DNS IPs and the hostname (ns1 and ns2) and then you will be able to use those nameservers. Please check Nameserver Registration Guide to see how you can register your nameservers with your registrar.
Apply for Free SSL Certificates
One of the important ranking signals is SSL. Here at Smart SEO Hosting, we provide you with free SSL certificates for all your domains. The certificate covers both your domain and the www subdomain.
You can easily apply for SSL for free following the below steps.
Important
In order to apply for the SSL you need to make sure that your website satisfies all the following conditions:
- Your website is accessible through HTTP. Make sure you can visit your website by visiting the website. The website does not need to be fully developed. As long as you can visit http://yourdomain.com this condition is met.
- Make sure your site has an SEO IP assigned to it (follow these steps if you haven't done it already)
- Your domain should use one of our SEO DNS server options
Free SSL Steps
- Login to your WHM reseller account
- From the left panel and under "Smart SEO Hosting" section, click on "Free SSL Certificate"
- Select your domain from the list of domains
- Click on "Apply" button
How to Login to cPanel Accounts via WHM?
As a reseller, you have full control over all your websites. You can even log in to the cPanel of one of your domains without having to know the password of the account.
You may even log in to a cPanel account when it is suspended.
Example
- Login to the WHM server of your reseller account.
- From the left menu click on the "List Accounts" item.
- On the right side, you should now have a list of all your domains.
- Next to each domain, there is a cPanel icon.
- In order to log in to the cPanel of a domain without entering its password, you should simply click on the cPanel icon of that domain.
The following video demonstrates the above steps:
What is the cPanel URL of my Accounts?
The cPanel URL of your domains is the same as the WHM URL of those domains but instead of 2087 the port number for cPanel is 2083.
For instance, if your WHM is https://whm12.smartseohosting.net:2087 your cPanel is going to be https://whm12.smartseohosting.net:2083 (notice the port numbers)
Install Software With One Click Installation
All the accounts you create with your reseller account come with a fully licensed Softaculous. Softaculous is a one-click installation which allows the end user to install many different popular products with ease.
Here are the steps you will need to take to install a new product: Go to your end-user panel (e.g. cPanel's URL will be https://domain.com:2083) and log in with your details. An easier method to login to your cPanel accounts is explained here. There click on the Softaculous Icon or Link. The Softaculous Enduser Panel will open.
Choose a Script
- On the left side you will find a list of categories.
- Choose a script from any of the categories or you can also select the script from the top scripts displayed in the center of the page.
- We are installing WordPress, which belongs to the category Blogs.
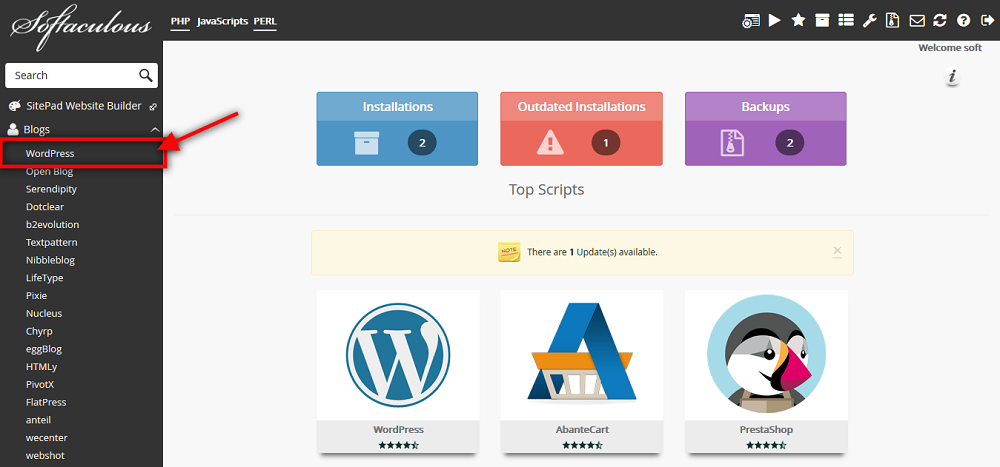
- Once you select the script you will be able to access various details of that script like ratings, reviews, demo URL etc.
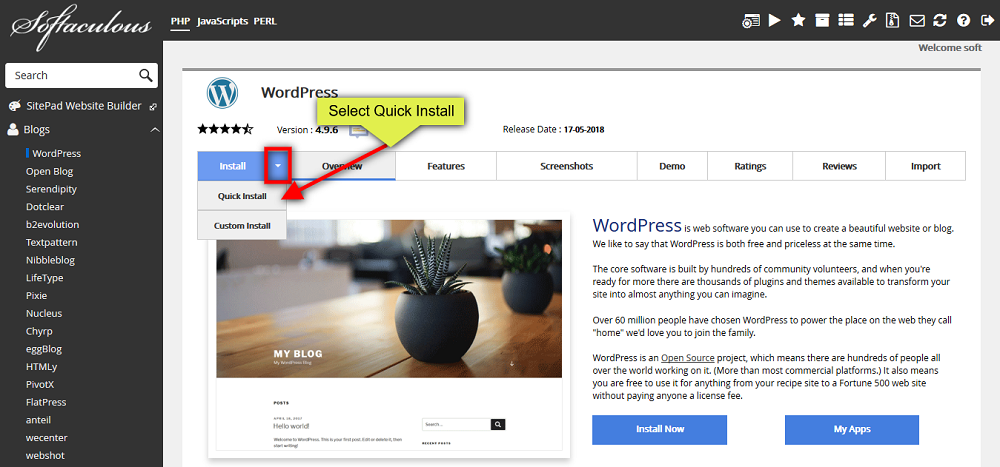
Choose Quick Install option
- Click on the Down Arrow on the Install Tab.
- You will see two options Quick Install and Custom Install, click on the Quick Install option.
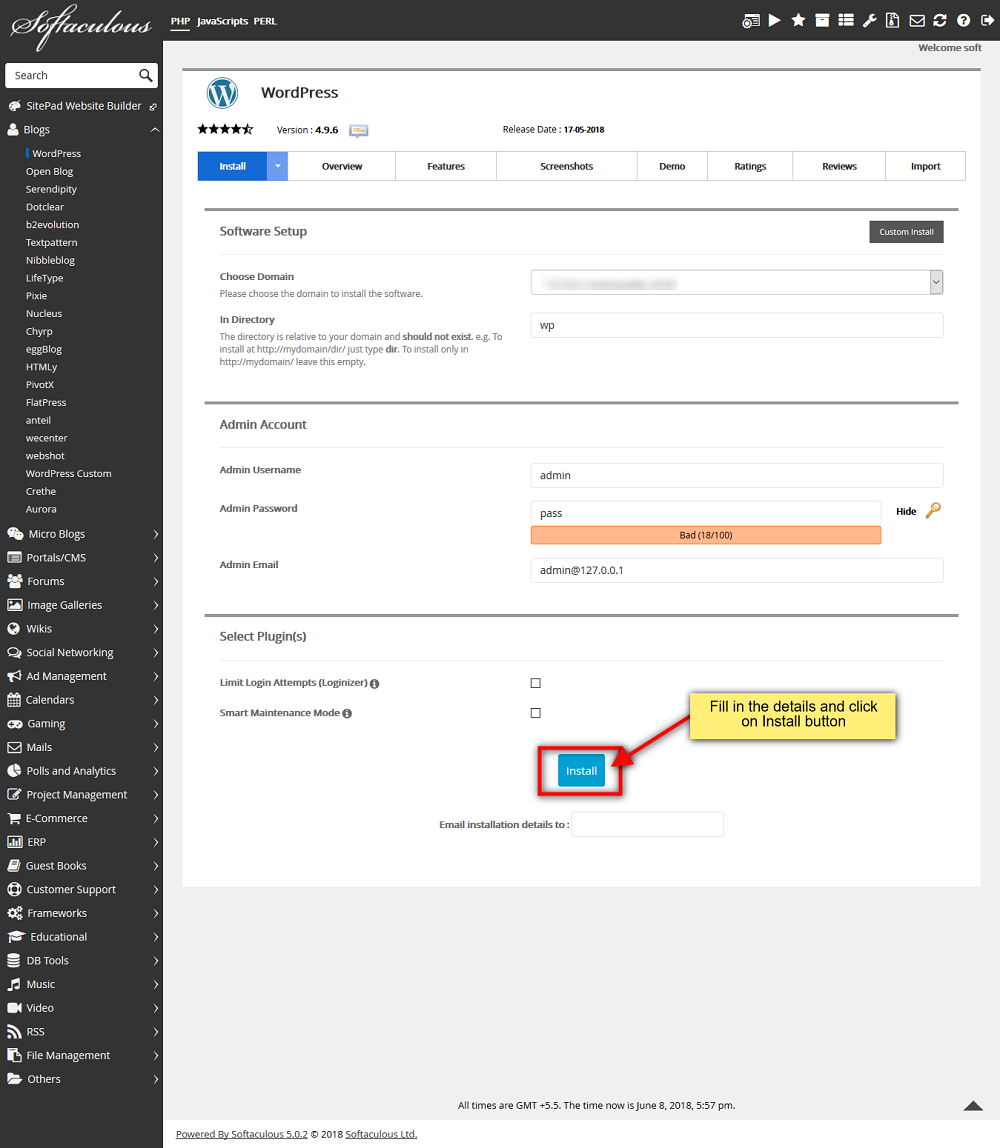
Fill in the Installation Details
- You will now see a form with various details.
- Fill in the details like domain name, directory, admin login details, etc.
Note
If you wish to install the script on the root of the domain eg: http://example.com please leave the In Directory field blank.
- Once you are done with the details click on Install button and this should do the trick. Installation time may vary in accordance to the size of the script and other factors. Please be patient.
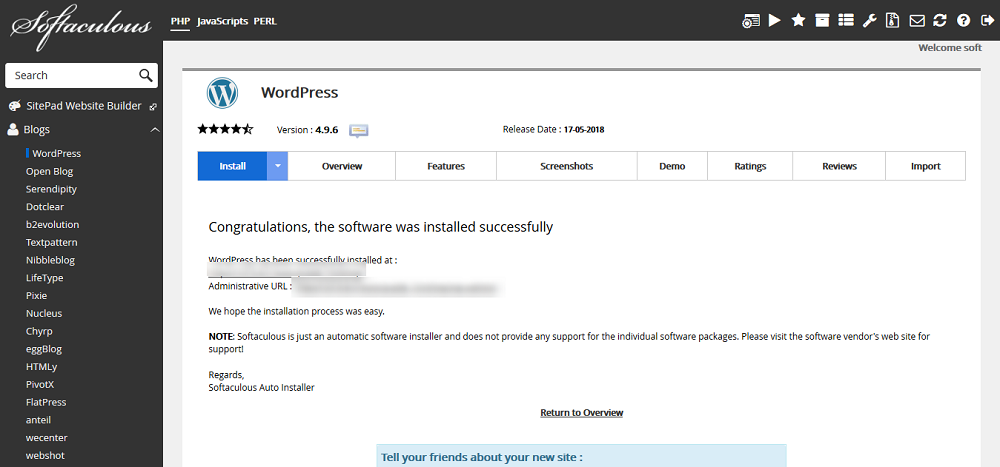
- As soon as the installation is complete Softaculous will provide links to your installation.
- Click on the links provided and this should redirect you directly to the site page or the admin homepage whichever you choose.
Notes On Backup Service
All our servers are on RAID-1. Which means anything that is written to any of the hard-drives is automatically mirrored to another hard drive. In case one of the hard drives fail your data is still protected on the other hard drive.
In addition to the above, we take daily, weekly and monthly backup of all your domains to an offshore datacenter.
Important
You should not solely depend on our service for backup. Smart SEO Hosting cannot be held responsible for any loss of data.
Note
The backup service is for disaster recovery. Restoration is not available to end user. Restoration of data is only free if it is the result of a problem at our end and is not always guaranteed.
Final Notes
How to get support?
- Please visit our support service page and open a ticket.
- Technical support is only available to our registered customers. Please make sure you are already logged in to your billing account to see the support department.
Note
Your billing account is the one that needs your email address and password.
Read the guides
You can see a list of our Guides on the left panel of this page.
Watch the videos
You may find our video tutorials here Alternatively you can access our Youtube channel here
Check the knowledgebase
You may find our knowledgebase here here
Check the blog
Please make sure you visit Smart SEO Hosting blog too.